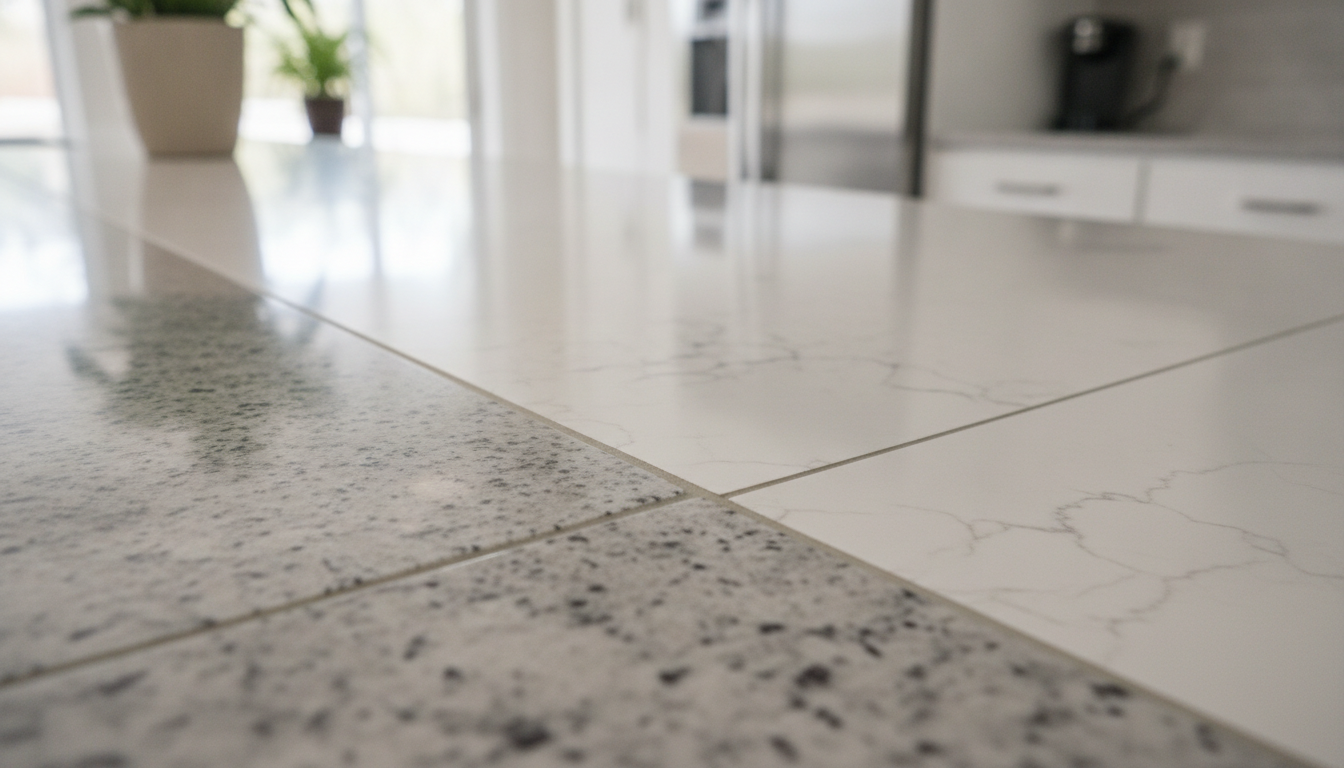
Planning a kitchen renovation often brings up questions about the final look of your surfaces. Many homeowners feel surprised when they learn that countertop seams are a standard part of the installation process.
These joints are usually necessary due to the physical limitations of stone slabs and the logistics of transporting heavy materials into your home. Understanding why these connections exist helps you set realistic expectations for your project.
By learning how professionals plan these junctions, you can approach your design with total confidence. Knowing what to anticipate ensures your kitchen remains both beautiful and structurally sound for years to come.
Key Takeaways
- Most stone surfaces require joints due to slab size limits.
- Professional installers strategically place connections to minimize visibility.
- Material type and pattern complexity influence how noticeable a joint appears.
- Proper fabrication ensures that these areas remain durable and easy to clean.
- Clear communication with your fabricator helps manage aesthetic expectations early.
Understanding Countertop Seams
Most homeowners are surprised to learn that a countertop joint is a standard feature in almost every custom kitchen installation. While we often dream of a single, unbroken slab of stone, the reality of logistics and material size makes this difficult to achieve. Understanding these connections helps you set realistic expectations for your renovation project.
What Are Countertop Seams?
In the world of interior design, countertop seams are the specific points where two separate pieces of stone or engineered material meet. These junctions are necessary because natural stone slabs have limited dimensions, and transporting massive, heavy pieces can be dangerous or impossible. Fabricators carefully cut these slabs to fit your unique kitchen layout, creating a connection that bridges the gap between sections.
It is important to remember that these joints are not flaws, but rather a standard part of the fabrication process. When handled by a skilled professional, these areas are bonded with specialized adhesives that match the color of your material. This creates a surface that is both functional and visually cohesive.
Importance of Seam Placement
The location of your countertop joint is one of the most critical factors in the success of your kitchen design. Strategic placement ensures that the structural integrity of the stone remains intact, preventing cracks or weaknesses over time. A well-planned layout minimizes the visual impact of the seam, allowing your beautiful countertops to remain the focal point of the room.
Homeowners should work closely with their fabricator to discuss where these countertop seams will fall. By choosing locations near sinks or cooktops, or in areas with less foot traffic, you can effectively hide the transition. Proper planning ensures that your investment looks seamless and lasts for many years to come.
Types of Countertop Materials and Their Seams
The secret to a high-end kitchen look often lies in how your chosen countertop material handles seams. Because every surface reacts differently during fabrication, understanding these differences helps you manage your expectations for the final result.
Some materials allow for a nearly invisible transition, while others require a more visible joint. Choosing the right option depends on your budget, style preferences, and how much you value a seamless countertop appearance.
Natural Stone Seams
Natural stones like granite and marble are heavy and unique, which makes joining them a delicate process. Fabricators use color-matched epoxy to fill the thin gap between slabs.
- Color matching: Experts tint the adhesive to blend with the stone’s natural veins.
- Pattern flow: Achieving a perfect match is difficult due to the organic nature of the stone.
- Durability: Properly filled seams are strong and resistant to moisture.
Quartz and Engineered Stone Seams
Quartz is a popular countertop surface because it is manufactured for consistency. Since the material is uniform, fabricators can create very tight joints that are barely noticeable to the naked eye.
The process involves using high-quality resins that harden to match the hardness of the stone itself. This results in a durable connection that stands up well to daily kitchen activities.
Laminate Seams
Laminate is a budget-friendly countertop material that typically features visible seams. Because laminate is a thin layer bonded to a substrate, the joints are often joined with a butt joint or a T-molding strip.
While these seams are more apparent than those in stone, they are functional and cost-effective. Regular maintenance is key to keeping these joints from swelling over time.
Solid Surface Seams
If you are looking for the most seamless countertop experience, solid surface materials like Corian are your best bet. These materials are chemically bonded together during installation.
The adhesive melts the edges of the two pieces, fusing them into one solid unit. This creates a smooth countertop surface where the seam is virtually undetectable to both the eye and the touch.
Typical Seam Locations in Kitchen Countertops
Strategic placement of seams is the secret to a professional-looking kitchen renovation. When you begin your countertop installation, discussing these locations with your fabricator is essential to ensure the final result meets your expectations.
Planning ahead helps minimize the visual impact of joints. By understanding where these lines naturally occur, you can better visualize the finished look of your kitchen countertop.
Between Counter Sections
Long runs of stone or engineered material often exceed the size of a single slab. In these cases, fabricators must join two pieces together to complete the length of the kitchen countertop.
- Seams are often placed at the narrowest point of the counter to reduce visibility.
- Installers try to align joints with existing appliances or cabinets.
- Proper support is required underneath these sections to prevent future movement.
Around Backsplashes
Corners are common areas where countertop seams appear. Because slabs are rigid, they cannot bend around sharp 90-degree angles without a joint.
Fabricators often use a mitered joint or a butt joint in these corners. This ensures the backsplash transitions smoothly from one wall to the next, maintaining a clean aesthetic throughout the countertop installation.
Near Sinks and Cooktops
The areas surrounding sinks and cooktops are considered high-stress zones. Placing countertop seams too close to these cutouts can weaken the structural integrity of the material.
Professional installers typically avoid placing joints directly through the center of a sink cutout. Instead, they prefer to place them at the narrowest points, which are less prone to cracking or shifting over time. This careful approach protects your investment and ensures long-term durability for your kitchen countertop.
Seam Aesthetics: What to Expect
While a seamless design is the ultimate goal for every professional fabricator, the reality of installation often involves small, necessary joints. Achieving a seamless countertop appearance depends heavily on the specific material you select and the skill of the installer. Understanding these variables helps you set realistic expectations for your kitchen project.
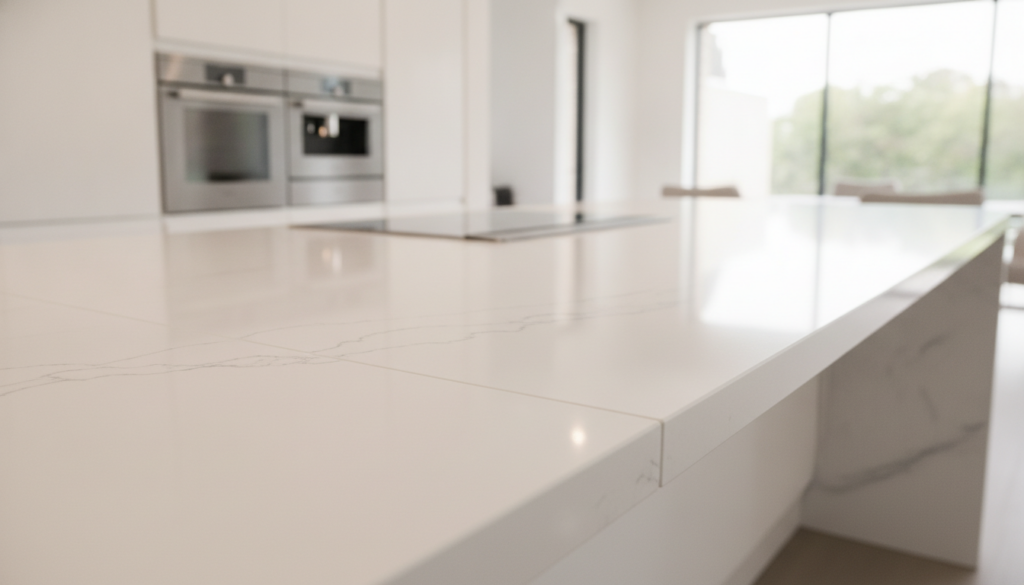
Seam Visibility
The visibility of a seam is primarily determined by the density and pattern of your chosen surface. Solid colors often reveal joints more clearly than materials with complex veining or flecks. Precision edge polishing is a critical step that ensures the two pieces meet with minimal gaps, creating a smooth transition that is pleasing to the eye.
You should expect that even the best installations will have a thin line where two pieces meet. However, professional fabricators use specialized tools to ensure these lines remain tight and flush. When the edges are perfectly aligned, the seam becomes much less noticeable under normal lighting conditions.
Color Matching and Design Choices
Modern fabrication relies on high-quality, color-matched adhesives to bridge the gap between stone sections. By tinting the epoxy to match the base color of your slab, installers can effectively hide the joint. This technique is essential for maintaining the visual flow of your kitchen surfaces.
Your choice of pattern also plays a significant role in how well a seam blends into the overall design. Materials with heavy movement or distinct patterns can sometimes make it harder to align veins perfectly, which might highlight the seam. Conversely, uniform colors or fine-grained materials allow for a more consistent, blended look.
| Material Type | Seam Visibility | Best Feature for Hiding Seams |
|---|---|---|
| Solid Surface | Very Low | Chemical bonding |
| Quartz | Low to Moderate | Color-matched epoxy |
| Natural Stone | Moderate | Complex patterns |
| Laminate | High | Tight edge profiles |
How Are Countertop Seams Created?
Achieving a near-invisible countertop joint requires a blend of high-tech machinery and human expertise. While the raw stone slab provides the foundation, the final look depends on how carefully the material is prepared and joined. Skilled fabricators work to ensure that every transition between pieces is as smooth as possible.
The Fabrication Process
The journey begins with precise templating of your kitchen space. Fabricators use digital tools to capture exact measurements, ensuring that the stone pieces will align perfectly during installation. Once the layout is confirmed, the stone is cut to match these specifications with extreme accuracy.
After cutting, the edges are polished to create a clean surface for bonding. A high-quality countertop joint is then secured using specialized epoxy resins that are color-matched to the stone. This process minimizes the appearance of the seam, making it feel like a natural part of the slab.
Precision Cutting Techniques
Modern fabrication relies heavily on advanced technology to achieve tight tolerances. Computer Numerical Control (CNC) machines and waterjet cutters allow fabricators to make intricate cuts that were once impossible. These tools ensure that the countertop joint remains consistent across the entire length of the surface.
By using automated systems, fabricators can reduce human error and maintain high standards of quality. The following table outlines the primary methods used to achieve these precise results:
| Cutting Method | Primary Benefit | Best Use Case |
|---|---|---|
| CNC Routing | High precision | Complex edge profiles |
| Waterjet Cutting | Minimal waste | Intricate stone patterns |
| Bridge Sawing | Speed and efficiency | Straight countertop joint |
Ultimately, the combination of cutting-edge technology and manual finishing techniques ensures a durable result. When these steps are followed correctly, the final installation provides a seamless and beautiful look for your home.
Best Practices for Seam Placement
Achieving a durable kitchen layout requires careful planning of every countertop joint. While many homeowners prioritize a seamless design, the physical reality of stone and quartz fabrication often necessitates specific breaks in the material. By focusing on where these breaks occur, you can protect your investment from future damage.
Strategic Positioning
The most effective way to manage seams is to place them in areas with minimal physical stress. Professional fabricators often align joints with the natural flow of the kitchen layout to keep them inconspicuous. Placing a joint at the center of a sink cutout or a cooktop opening is a common technique that reduces the amount of visible material.
“The longevity of a stone surface is dictated by the precision of its joints. A well-placed seam is virtually invisible and structurally sound for decades.”
Avoiding Weak Points
You should always avoid placing seams in narrow strips of stone, especially in front of or behind a sink. These areas are prone to high tension and frequent moisture exposure, which can lead to cracking over time. A seamless design is ideal, but when a joint is unavoidable, it must be supported by a solid substrate to ensure stability.
| Placement Strategy | Benefit | Risk Level |
|---|---|---|
| Sink Cutout | Reduces visible length | Low |
| Corner Junction | Natural transition point | Low |
| Narrow Bridge | None | High |
By choosing a professional who understands these structural requirements, you ensure your countertop joint remains secure. Taking the time to plan these details early in the process prevents costly repairs later. A thoughtful approach to installation guarantees that your kitchen remains both beautiful and functional for many years.
Maintaining Your Countertop Seams
Keeping your kitchen looking pristine requires a proactive approach to seam maintenance. Once your installation is complete, the longevity of your countertop surface depends on how well you protect the joints from daily kitchen hazards.
By following a few simple habits, you can ensure that your kitchen remains both functional and beautiful for years to come. Consistent care prevents moisture from seeping into the joints, which is the primary cause of long-term structural issues.
Cleaning Guidelines
Effective cleaning is the first line of defense for your kitchen. To maintain a seamless design, you should always wipe up spills immediately rather than letting liquids sit on the joint.
- Use a soft microfiber cloth to wipe away moisture.
- Stick to pH-neutral cleaners specifically formulated for your material.
- Avoid soaking the area, as excess water can penetrate the adhesive.
- Dry the seam thoroughly after cleaning to prevent mineral buildup.
Prevention of Wear and Tear
Beyond daily cleaning, you must be mindful of how you use your kitchen space. Protecting the countertop surface from physical stress is vital for keeping the joints tight and invisible.
Avoid placing heavy pots or pans directly over the seam, as the impact can cause micro-cracks or shift the adhesive. Furthermore, steer clear of harsh chemicals like bleach or abrasive scouring pads, which can degrade the bonding agent and ruin your seamless design.
Regular maintenance is the most cost-effective way to preserve the beauty and integrity of your stone or engineered surfaces.
By treating your joints with care, you prevent premature wear and ensure that your investment stays in top condition. Simple preventative measures today will save you from needing professional repairs in the future.
Repairing Countertop Seams
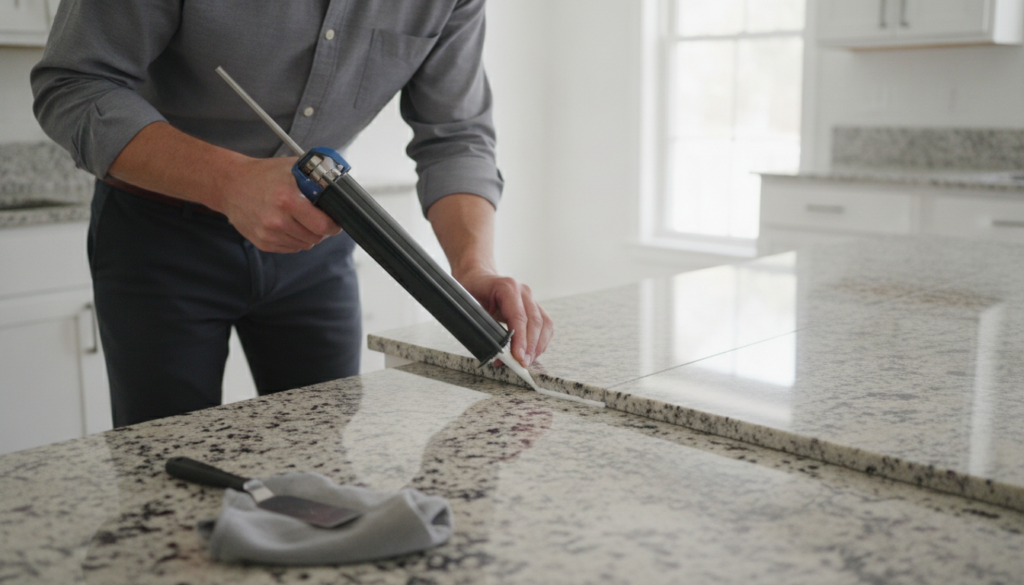
Even the most durable kitchen surfaces can develop issues over time that require your attention. While high-quality installations are built to last, daily use can eventually impact the condition of your countertop surface. Recognizing when a joint needs maintenance is the first step in preserving your kitchen’s beauty.
Signs of Damage
It is helpful to inspect your kitchen regularly for early indicators of trouble. Catching these problems early can prevent more significant damage to the surrounding material. Keep an eye out for the following common issues:
- Visible gaps or separation between two slabs.
- Small chips or cracks appearing along the edge of the joint.
- Discoloration or dark lines caused by moisture seeping into the seam.
- Uneven surfaces where the two pieces no longer sit flush.
DIY Repair vs. Professional Help
Deciding how to handle a countertop repair depends largely on the severity of the damage. For minor cosmetic issues, such as a small surface chip or a slight color mismatch, you might find success with a simple repair kit. These kits often include color-matched epoxy that can fill small voids effectively.
However, you should contact a professional if you notice structural separation or deep cracks. A specialist has the tools to re-level the slabs and ensure the countertop surface is properly sealed against water damage. Relying on an expert ensures that your investment remains safe and looks as good as new for years to come.
Costs Associated with Countertop Seams
When planning your renovation, remember that the number of seams can significantly change your total investment. While many people focus solely on the slab price, the complexity of the fabrication process often dictates the final bill. Understanding these variables helps you avoid surprises when the final invoice arrives.
Factors Influencing Costs
The primary driver of cost is the type of countertop material you select. Harder stones like granite or engineered quartz require specialized diamond-tipped blades and more time to cut, which increases labor fees. If your design features intricate patterns or veining, matching those lines at a seam requires extra precision and expertise.
Fabricators also charge based on the total number of seams required for your layout. A simple, straight run is much cheaper to install than a complex L-shaped or U-shaped configuration. Complexity adds time, and in the world of professional installation, time is money.
Budgeting for Installation
To budget effectively, always request a detailed quote that breaks down material costs versus labor. It is wise to set aside a small contingency fund for unexpected adjustments during the installation process. Investing in a high-quality, seamless look now can save you from needing a costly countertop repair later on.
Remember that a well-installed kitchen countertop is a long-term asset for your home. Choosing a professional who prioritizes clean, tight seams ensures that your surface remains durable and beautiful for years. By balancing your design goals with these practical financial considerations, you can achieve a stunning result that fits your budget perfectly.
The Role of Professional Installers
Achieving a flawless kitchen finish depends heavily on the hands that perform your countertop installation. While it might be tempting to consider DIY methods, the complexity of modern surfaces requires specialized tools and years of hands-on experience.
Benefits of Hiring Experts
Experienced contractors bring a level of precision that is difficult to replicate without professional training. They understand how to manage the unique characteristics of every countertop material, ensuring that seams are tight, level, and aesthetically pleasing.
Beyond the initial setup, experts provide peace of mind regarding the structural integrity of your surfaces. Should an issue arise in the future, a professional is better equipped to handle a complex countertop repair, saving you from costly mistakes or permanent damage to your investment.
“Quality is never an accident; it is always the result of high intention, sincere effort, intelligent direction and skillful execution.”
What to Look for in a Contractor
Finding the right partner for your project requires a bit of research. Use this checklist to ensure you are hiring a qualified professional who can handle your specific countertop material needs:
- Portfolio Examples: Ask to see photos of past work, specifically focusing on how they handle seams in high-traffic areas.
- References: Speak with previous clients to gauge their satisfaction with the final countertop installation and the contractor’s communication style.
- Certifications: Look for industry-recognized credentials that demonstrate a commitment to safety and high-quality fabrication standards.
- Warranty Policies: A reputable expert will stand behind their work with a clear warranty on both the labor and the finished seams.
Frequently Asked Questions About Countertop Seams
It is perfectly normal to have questions about how your new surfaces will come together during the countertop installation process. Many people worry that visible lines will ruin the aesthetic of their kitchen, but modern fabrication techniques have come a long way. Understanding the reality of these joints can help you feel much more confident about your upcoming renovation.
Common Concerns Homeowners Have
The most frequent question involves the visibility of countertop seams. While it is rare to make a joint completely invisible, professional fabricators use color-matched epoxies to ensure the transition is as smooth as possible. You might be surprised at how well a skilled installer can blend these areas into the natural pattern of your stone.
Another common worry is whether these areas will become weak points over time. When a high-quality adhesive is used, the joint is often just as strong as the surrounding material. Proper support during the initial setup ensures that your surfaces remain stable and durable for many years.
Tips for First-Time Buyers
If you are new to this process, the best advice is to communicate openly with your fabricator before the work begins. Ask to see a layout plan so you know exactly where the joints will be placed. This simple step helps manage expectations and prevents any unwanted surprises once the countertop installation is complete.
It is also helpful to choose materials that are more forgiving. Some patterns, such as those with heavy veining or speckles, naturally hide countertop seams better than solid, uniform colors. By selecting the right material and working with an experienced team, you can achieve a beautiful, cohesive look that enhances your home.
Finally, remember that a professional countertop installation is an investment in your home’s value. Do not be afraid to ask your contractor about their specific techniques for minimizing joints. A transparent professional will be happy to explain their process and put your mind at ease.
Conclusion: Making Informed Decisions on Countertop Seams
Selecting the right materials for your home renovation requires a clear vision of your aesthetic goals. A high-quality kitchen countertop serves as the centerpiece of your culinary space, blending utility with visual appeal.
Focusing on expert fabrication ensures that your surfaces remain durable for years. You deserve a kitchen countertop that reflects your personal style while standing up to daily use. Working with skilled professionals helps you navigate the complexities of material selection and layout planning.
Many homeowners dream of a seamless countertop to create a clean, modern look. Achieving this result depends on choosing the right stone or engineered material for your specific floor plan. Proper care and routine maintenance protect your investment and keep your surfaces looking pristine.
Take the time to research local fabricators who prioritize precision and quality craftsmanship. Your choices today shape the long-term value and beauty of your home. We invite you to share your renovation journey or reach out with questions about your upcoming project.